Cricut Machine Setup: Easy Tutorial to Get Started!
Are you in need of a Cricut machine setup? I’ve got your back😉! Buying a new Cricut machine, unboxing, and finally setting up is an overwhelming experience. I still cherish those in my mind. But is it that easy? Yes, everyone, including those who have just got their new Cricut product, can set up their Cricut in no time!
Therefore, I have created an easy-to-follow tutorial to guide you through setting up your Cricut. In this post, you will first learn about the system requirements for your Windows PC and then start learning how to setup Cricut.
System Requirements to Setup Cricut on Your
Computer
Before we delve into the Cricut machine setup, you must know whether your system is compatible with running Cricut software or if you need another device. In this blog, I am using my 3-year-old PC, which is compatible with running the software. However, the standard system requirements as per Cricut for Windows PCs are as follows:
●
Windows 10
or later OS is needed
●
Intel
Dual-Core or equivalent AMD processor
●
4 GB RAM
●
2 GB free
disk space
● Bluetooth built-in or available USB port
Cricut Machine Setup: 4 Simple Instructions
Is your computer compatible with Cricut? If so, you can learn how to setup Cricut. Below, I will start with unboxing and then move to the final steps of connection, where our Cricut setup will end. Let’s get started now!
Step 1: Unboxing the Cricut Machine

When I got my first Cricut Maker, I was too ecstatic when unboxing it. I can feel your excitement, too. While unboxing, be a little careful and check if all your items are free from any types of defects. However, here is the list of 13 items that I have received in the box:
●
Welcome Book
●
Cricut Maker
●
USB cable
●
Power
adapter
●
Warranty
Document
●
Rotary Blade
and Drive Housing
●
FabricGrip
Mat (30.5 cm x 30.5 cm)
●
LightGrip
Mat (30.5 cm x 30.5 cm)
●
Premium
Fine-Point Blade + Housing
●
Fine Point
Pen, Black
●
Free trial
plan to Cricut Access
●
50 free
pre-made projects, like 25 sewing patterns
● Materials for your projects
I hope you also received it!😁Now, let’s move on to the next steps for the Cricut machine setup.
Step 2: Downloading the Cricut Software
Now, it’s time to download the software to the Windows PC. Make sure you have an internet connection at a reasonable speed to download the app. Here’s how to download the Cricut Design Space app on Windows 10:
- Open a browser and navigate to design.cricut.com.
- On the next page, you will be jumped to
accept Cricut’s Terms of Use and
Privacy Policy.

- After accepting that, download
the software.

- Once you have downloaded the
file, you should open it. To do so, go to your File Explorer and click on the Downloads folder.
- After that, click twice on the
download.
- Now, it will start installing
your Cricut Design Space app.

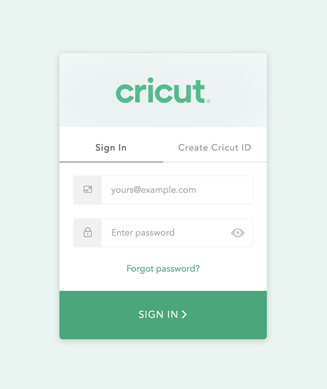
- Once installed, you can create or
sign in to your Cricut account.
Finally, the Cricut software is also downloaded. Next, you need to follow some on-screen steps to complete the Cricut machine setup.
Step 3: Setup Cricut Using Design Space
- Launch a Cricut app.
- Click on
Product Setup.
- Then, you need to select the option Smart Cutting Machine.

- After that, you should click Cricut Maker.
- Next, you have to connect your Cricut for the Cricut machine setup.
Step 4: Connect the Cricut Machine to a PC
Before establishing a connection, you will need to find a flat surface like a table. There, you have to place your Cricut within 10 to 15 feet. Once done, follow the steps mentioned below:
- Start your PC and head to the Start menu.
- After that, go to Settings.

- Now, you should select an option:
Devices.
- Then, you have to enable your
Bluetooth.
- Once Bluetooth is turned on,
select the Add Bluetooth or other
device.

- Next, you have to click on Bluetooth and wait for a while until you notice your machine
in the available list.
- Lastly, you have to go to the
visible machine from the list to finish Bluetooth pairing.
FAQs
Question 1: How to connect Cricut to desktop
using USB?
Answer: In order to connect your Cricut to your desktop using a USB cord, you need to follow the steps given below:
- Turn on your Cricut and PC.
- After that, you need to download the Cricut
Design app.
- Then, take your USB cord and plug it into
the USB port of the machine.
- Now, grab the other end of the USB cable and
insert it right into the PC.
Question 2: What do I need to setup my Cricut?
Answer: Setting up the machine is a cakewalk. As mentioned below, you need a small number of items. Make sure you have the following items before you start the Cricut machine setup.
- Cricut cutting machine
- USB cord or Bluetooth in-built device
- Cricut Design Space software
- Cricut tools
- Compatible computer
Question 3: What should I need on my Mac for
Cricut setup?
Answer: In order to setup your machine, you will need the following on your Mac computer:
●
Operating
System: macOS 11 or later
●
CPU 1.83 GHz
●
RAM: 4GB
●
2 GB free
disk space
●
An available
USB port or Bluetooth connection


Comments
Post a Comment